Problem
In order to do anything advanced in Windows Azure you will need to use Microsoft’s Powershell.
This includes things such as managing multiple access keys for virtual networks or simply assigning a static IP address to a VM.
Prerequisites
You will need to download and install “Microsoft Azure PowerShell” CMDLETS. Although once you have installed the CMDLETS you can access the commands from any powershell console, we recommend launching the dedicated Azure Powershell console this will limit the commands to azure specific commands.
The CMDLETS and console can be downloaded and installed via the Web Platform Installer
Solution 1 (The AD Method)
In this solution you simply authenticate to Azure using PowerShell via a single PowerShell command.
- Open “Microsoft Azure PowerShell” console in an elevated state.
- Type the following command: Get-AzurePublishSettingsFile.
- This will prompt you to enter login details for your Azure subscription account.
Once you have logged in you have successfully connected PowerShell to Azure.
Solution 2 (Certificate Method)
This method requires you create a “publishSettingFile” from the Azure management portal (using PowerShell) then import that file into PowerShell.
- Sign in to account on the Azure Management Portal.
- Open the Azure PowerShell console in an elevated state.
- Type the following command:Get-AzurePublishSettingsFile
- If you are logged into you azure account a download will launch in your web browser. To avoid issues when multiple browsers are installed. make sure you log into Azure portal using your “Default” web browser.
- Save the publishing profile file.
- Type the following command substituting the path for the location of where you saved the publishing profile file:Import-AzurePublishSettingsFile C:\Users\<UserProfile>\Downloads\<SubscriptionName>-credentials.publishsettings
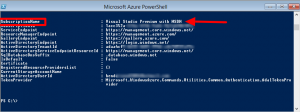
Confirm account and subscriptions available to PowerShell
Use the:
Get-AzureSubscription
Command to list all accounts and subscriptions available.
Set Default Azure subscription
Use the following command to set a default Azure subscription
Select-AzureSubscription -default [subscriptionName]
Substitute [subscriptionName] for the name of a subscription you wish to make default. you can get the “subscriptionName” value by using the command:
Get-AzureSubscription
Set the current working subscription
If you have multiple subscriptions you can switch between them using the following command:
Select-AzureSubscription -current [subscriptionName]
Substitute [subscriptionName] for the name of a subscription you wish to set as current. You can get the “subscriptionName” value by using the command:
Get-AzureSubscription


Once I realized that “Windows Azure Active Directory Module for Windows PowerShell” was not the same as “Microsoft Azure PowerShell” this was just what I needed.
Get-AzurePublishSettingsFile : The term ‘Get-AzurePublishSettingsFile’ is not
recognized as the name of a cmdlet, function, script file, or operable
program. Check the spelling of the name, or if a path was included, verify
that the path is correct and try again.
The current version of the module warns that the “current” and “default” parameters for Select-AzureSubscription have both been deprecated.
My Powershell keeps getting disconnected from Azure if I change my password. That leads to jobs failing to upload data.
DO I need to import publishsettings file everytime I upload to Azure blob using powershell comand?